In this notebook we will cover how to perform image transformations including:
Accessing and manipulating images pixels
Image resizing
Cropping
Flipping
import os
import cv2
import numpy as np
import matplotlib.pyplot as plt
%matplotlib inline

from zipfile import ZipFile
from urllib.request import urlretrieve

from IPython.display import Image
Download Assets
The download_and_unzip(...) is used to download and extract the notebook assests.
def download_and_unzip(url, save_path):
    print(f"Downloading and extracting assests....", end="")

    # Downloading zip file using urllib package.
    urlretrieve(url, save_path)

    try:
        # Extracting zip file using the zipfile package.
        with ZipFile(save_path) as z:
            # Extract ZIP file contents in the same directory.
            z.extractall(os.path.split(save_path)[0])

        print("Done")

    except Exception as e:
        print("\nInvalid file.", e)
URL = r"https://www.dropbox.com/s/rys6f1vprily2bg/opencv_bootcamp_assets_NB2.zip?dl=1"
asset_zip_path = os.path.join(os.getcwd(), "opencv_bootcamp_assets_NB2.zip")
# Download if assest ZIP does not exists.
if not os.path.exists(asset_zip_path):
download_and_unzip(URL, asset_zip_path)Original checkerboard image
# Read image as gray scale.
cb_img = cv2.imread("checkerboard_18x18.png", 0)

# Set color map to gray scale for proper rendering.
plt.imshow(cb_img, cmap="gray")
print(cb_img)
[[ 0 0 0 0 0 0 255 255 255 255 255 255 0 0 0 0 0 0]
[ 0 0 0 0 0 0 255 255 255 255 255 255 0 0 0 0 0 0]
[ 0 0 0 0 0 0 255 255 255 255 255 255 0 0 0 0 0 0]
[ 0 0 0 0 0 0 255 255 255 255 255 255 0 0 0 0 0 0]
[ 0 0 0 0 0 0 255 255 255 255 255 255 0 0 0 0 0 0]
[ 0 0 0 0 0 0 255 255 255 255 255 255 0 0 0 0 0 0]
[255 255 255 255 255 255 0 0 0 0 0 0 255 255 255 255 255 255]
[255 255 255 255 255 255 0 0 0 0 0 0 255 255 255 255 255 255]
[255 255 255 255 255 255 0 0 0 0 0 0 255 255 255 255 255 255]
[255 255 255 255 255 255 0 0 0 0 0 0 255 255 255 255 255 255]
[255 255 255 255 255 255 0 0 0 0 0 0 255 255 255 255 255 255]
[255 255 255 255 255 255 0 0 0 0 0 0 255 255 255 255 255 255]
[ 0 0 0 0 0 0 255 255 255 255 255 255 0 0 0 0 0 0]
[ 0 0 0 0 0 0 255 255 255 255 255 255 0 0 0 0 0 0]
[ 0 0 0 0 0 0 255 255 255 255 255 255 0 0 0 0 0 0]
[ 0 0 0 0 0 0 255 255 255 255 255 255 0 0 0 0 0 0]
[ 0 0 0 0 0 0 255 255 255 255 255 255 0 0 0 0 0 0]
[ 0 0 0 0 0 0 255 255 255 255 255 255 0 0 0 0 0 0]]

Accessing Individual Pixels
Let us see how to access a pixel in the image.
For accessing any pixel in a numpy matrix, you have to use matrix notation such as matrix[r,c], where the r is the row number and c is the column number. Also note that the matrix is 0-indexed.
For example, if you want to access the first pixel, you need to specify matrix[0,0]. Let us see with some examples. We will print one black pixel from top-left and one white pixel from top-center.
# print the first pixel of the first black box
print(cb_img[0, 0])
# print the first white pixel to the right of the first black box
print(cb_img[0, 6])
0
255
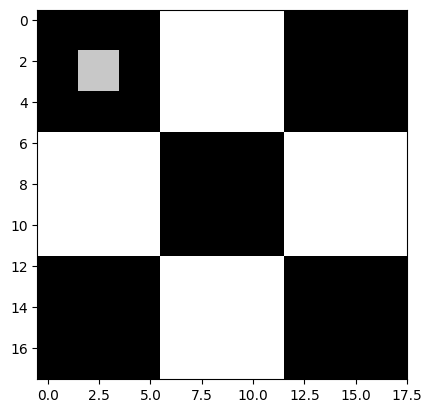
Modifying Image Pixels
We can modify the intensity values of pixels in the same manner as described above.
cb_img_copy = cb_img.copy()
cb_img_copy[2, 2] = 200
cb_img_copy[2, 3] = 200
cb_img_copy[3, 2] = 200
cb_img_copy[3, 3] = 200

# Same as above
# cb_img_copy[2:4,2:4] = 200

plt.imshow(cb_img_copy, cmap="gray")
print(cb_img_copy)
[[ 0 0 0 0 0 0 255 255 255 255 255 255 0 0 0 0 0 0]
[ 0 0 0 0 0 0 255 255 255 255 255 255 0 0 0 0 0 0]
[ 0 0 200 200 0 0 255 255 255 255 255 255 0 0 0 0 0 0]
[ 0 0 200 200 0 0 255 255 255 255 255 255 0 0 0 0 0 0]
[ 0 0 0 0 0 0 255 255 255 255 255 255 0 0 0 0 0 0]
[ 0 0 0 0 0 0 255 255 255 255 255 255 0 0 0 0 0 0]
[255 255 255 255 255 255 0 0 0 0 0 0 255 255 255 255 255 255]
[255 255 255 255 255 255 0 0 0 0 0 0 255 255 255 255 255 255]
[255 255 255 255 255 255 0 0 0 0 0 0 255 255 255 255 255 255]
[255 255 255 255 255 255 0 0 0 0 0 0 255 255 255 255 255 255]
[255 255 255 255 255 255 0 0 0 0 0 0 255 255 255 255 255 255]
[255 255 255 255 255 255 0 0 0 0 0 0 255 255 255 255 255 255]
[ 0 0 0 0 0 0 255 255 255 255 255 255 0 0 0 0 0 0]
[ 0 0 0 0 0 0 255 255 255 255 255 255 0 0 0 0 0 0]
[ 0 0 0 0 0 0 255 255 255 255 255 255 0 0 0 0 0 0]
[ 0 0 0 0 0 0 255 255 255 255 255 255 0 0 0 0 0 0]
[ 0 0 0 0 0 0 255 255 255 255 255 255 0 0 0 0 0 0]
[ 0 0 0 0 0 0 255 255 255 255 255 255 0 0 0 0 0 0]]
Cropping Images
Cropping an image is simply achieved by selecting a specific (pixel) region of the image.
img_NZ_bgr = cv2.imread("New_Zealand_Boat.jpg", cv2.IMREAD_COLOR)
img_NZ_rgb = img_NZ_bgr[:, :, ::-1]

plt.imshow(img_NZ_rgb)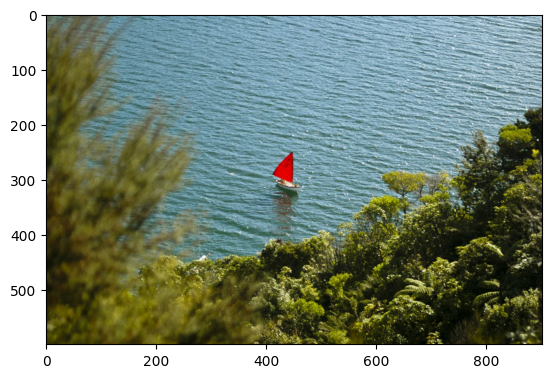
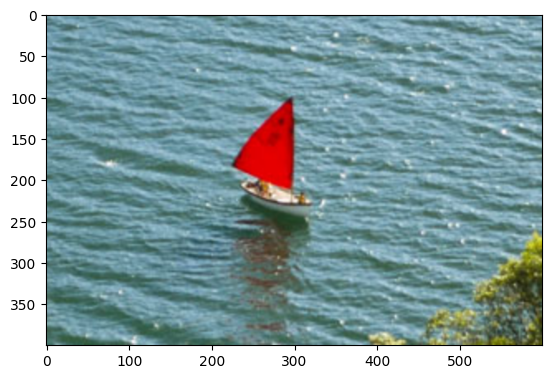
Crop out the middle region of the image
cropped_region = img_NZ_rgb[200:400, 300:600]
print(cropped_region.shape)
plt.imshow(cropped_region)
(200, 300, 3)

Resizing Images
The function resize resizes the image src down to or up to the specified size. The size and type are derived from the src,dsize,fx, and fy.
Function Syntax
dst = resize( src, dsize[, dst[, fx[, fy[, interpolation]]]] )dst: output image; it has the size dsize (when it is non-zero) or the size computed from src.size(), fx, and fy; the type of dst is the same as of src.
The function has 2 required arguments:
src: input imagedsize: output image size
Optional arguments that are often used include:
fx: Scale factor along the horizontal axis; when it equals 0, it is computed as (𝚍𝚘𝚞𝚋𝚕𝚎)𝚍𝚜𝚒𝚣𝚎.𝚠𝚒𝚍𝚝𝚑/𝚜𝚛𝚌.𝚌𝚘𝚕𝚜fy: Scale factor along the vertical axis; when it equals 0, it is computed as (𝚍𝚘𝚞𝚋𝚕𝚎)𝚍𝚜𝚒𝚣𝚎.𝚑𝚎𝚒𝚐𝚑𝚝/𝚜𝚛𝚌.𝚛𝚘𝚠𝚜
The output image has the size dsize (when it is non-zero) or the size computed from src.size(), fx, and fy; the type of dst is the same as of src.
OpenCV Documentation
resize(): Documentation link
Method 1: Specifying Scaling Factor using fx and fy
resized_cropped_region_2x = cv2.resize(cropped_region, None, fx=2, fy=2)
print(resized_cropped_region_2x.shape)
plt.imshow(resized_cropped_region_2x)
(400, 600, 3)
Medthod 2: Specifying exact size of the output image
desired_width = 100
desired_height = 200
dim = (desired_width, desired_height)

# Resize background image to same size as logo image
resized_cropped_region = cv2.resize(cropped_region, dsize=dim, interpolation=cv2.INTER_AREA)
plt.imshow(resized_cropped_region)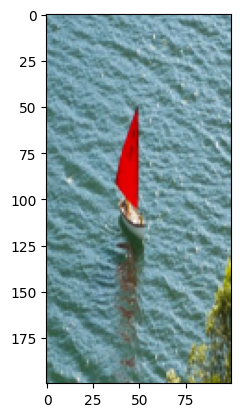
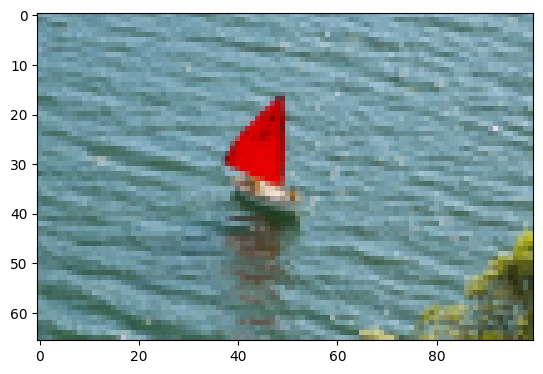
Resize while maintaining aspect ratio
# Method 2: Using 'dsize'
desired_width = 100
aspect_ratio = desired_width / cropped_region.shape[1]
desired_height = int(cropped_region.shape[0] * aspect_ratio)
dim = (desired_width, desired_height)

# Resize image
resized_cropped_region = cv2.resize(cropped_region, dsize=dim, interpolation=cv2.INTER_AREA)
print(resized_cropped_region.shape)
plt.imshow(resized_cropped_region)
(66, 100, 3)
Let’s actually show the (cropped) resized image.
# Swap channel order
resized_cropped_region_2x = resized_cropped_region_2x[:, :, ::-1]

# Save resized image to disk
cv2.imwrite("resized_cropped_region_2x.png", resized_cropped_region_2x)

# Display the cropped and resized image
Image(filename="resized_cropped_region_2x.png")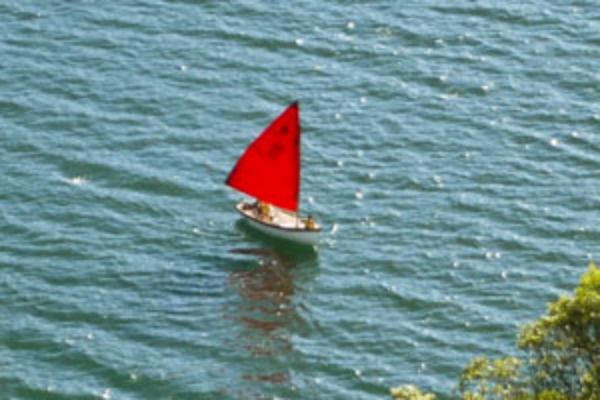
# Swap channel order
cropped_region = cropped_region[:, :, ::-1]

# Save cropped 'region'
cv2.imwrite("cropped_region.png", cropped_region)

# Display the cropped and resized image
Image(filename="cropped_region.png")
Flipping Images
The function flip flips the array in one of three different ways (row and column indices are 0-based):
Function Syntax
dst = cv.flip( src, flipCode )dst: output array of the same size and type as src.
The function has 2 required arguments:
src: input imageflipCode: a flag to specify how to flip the array; 0 means flipping around the x-axis and positive value (for example, 1) means flipping around y-axis. Negative value (for example, -1) means flipping around both axes.
OpenCV Documentation
flip: Documentation link
img_NZ_rgb_flipped_horz = cv2.flip(img_NZ_rgb, 1)
img_NZ_rgb_flipped_vert = cv2.flip(img_NZ_rgb, 0)
img_NZ_rgb_flipped_both = cv2.flip(img_NZ_rgb, -1)

# Show the images
plt.figure(figsize=(18, 5))
plt.subplot(141);plt.imshow(img_NZ_rgb_flipped_horz);plt.title("Horizontal Flip");
plt.subplot(142);plt.imshow(img_NZ_rgb_flipped_vert);plt.title("Vertical Flip");
plt.subplot(143);plt.imshow(img_NZ_rgb_flipped_both);plt.title("Both Flipped");
plt.subplot(144);plt.imshow(img_NZ_rgb);plt.title("Original");
