Writing a video using OpenCV
While building applications, it becomes important to save demo videos of your work as well as many applications themselves might require saving a video clip. For example, in a surveiallance application, you might have to save a video clip as soon as you see something unusual happening.
In this notebook, we will describe how to save a video in avi and mp4 formats using OpenCV.
# import the library
import os
import cv2
import matplotlib.pyplot as plt

from zipfile import ZipFile
from urllib.request import urlretrieve

from IPython.display import YouTubeVideo, display, HTML
from base64 import b64encode

%matplotlib inline
Download Assets
def download_and_unzip(url, save_path):
    print(f"Downloading and extracting assests....", end="")

    # Downloading zip file using urllib package.
    urlretrieve(url, save_path)

    try:
        # Extracting zip file using the zipfile package.
        with ZipFile(save_path) as z:
            # Extract ZIP file contents in the same directory.
            z.extractall(os.path.split(save_path)[0])

        print("Done")

    except Exception as e:
        print("\nInvalid file.", e)
URL = r"https://www.dropbox.com/s/p8h7ckeo2dn1jtz/opencv_bootcamp_assets_NB6.zip?dl=1"
asset_zip_path = os.path.join(os.getcwd(), "opencv_bootcamp_assets_NB6.zip")
# Download if assest ZIP does not exists.
if not os.path.exists(asset_zip_path):
download_and_unzip(URL, asset_zip_path)Read Video from Source
source = 'race_car.mp4'  # source = 0 for webcam
cap = cv2.VideoCapture(source)
if not cap.isOpened():
print("Error opening video stream or file")Read and display one frame
ret, frame = cap.read()plt.imshow(frame[..., ::-1])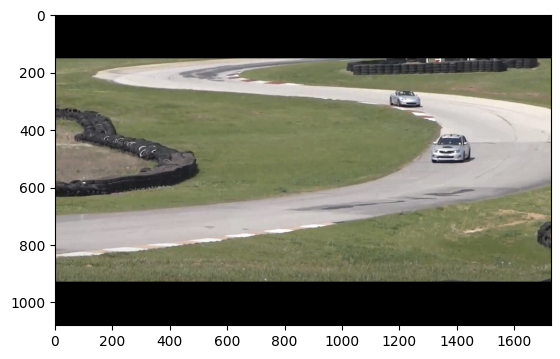
Display the video file
HTML 5 Video Player
from IPython.display import HTML
HTML("""
<video width="700" height="438" controls>
    <source src="race_car.mp4" type="video/mp4">
</video>
""")YouTube Player
video = YouTubeVideo("RwxVEjv78LQ")
display(video)Write Video using OpenCV
For writing the video, you need to create a videowriter object with the right parameters.
Function Syntax
VideoWriter object = cv.VideoWriter(filename, fourcc, fps, frameSize )where, Parameters
filename: Name of the output video file.fourcc: 4-character code of codec used to compress the frames. For example,VideoWriter::fourcc('P','I','M','1')is a MPEG-1 codec, VideoWriter::fourcc(‘M’,‘J’,‘P’,‘G’) is a motion-jpeg codec etc. List of codes can be obtained at Video Codecs by FOURCC page. FFMPEG backend with MP4 container natively uses other values as fourcc code: see ObjectType, so you may receive a warning message from OpenCV about fourcc code conversion.fps: Framerate of the created video stream.frameSize: Size of the video frames.
# Default resolutions of the frame are obtained.
# Convert the resolutions from float to integer.
frame_width = int(cap.get(3))
frame_height = int(cap.get(4))

# Define the codec and create VideoWriter object.
out_avi = cv2.VideoWriter("race_car_out.avi", cv2.VideoWriter_fourcc("M", "J", "P", "G"), 10, (frame_width, frame_height))

out_mp4 = cv2.VideoWriter("race_car_out.mp4", cv2.VideoWriter_fourcc(*"XVID"), 10, (frame_width, frame_height))
OpenCV: FFMPEG: tag 0x44495658/'XVID' is not supported with codec id 12 and format 'mp4 / MP4 (MPEG-4 Part 14)'
OpenCV: FFMPEG: fallback to use tag 0x7634706d/'mp4v'
Read frames and write to file
We will read the frames from the race-car video and write the same to the two objects we created in the previous step. We should release the objects after the task is complete.
# Read until video is completed
while cap.isOpened():
    # Capture frame-by-frame
    ret, frame = cap.read()

    if ret:
        # Write the frame to the output files
        out_avi.write(frame)
        out_mp4.write(frame)

    # Break the loop
    else:
        break
# When everything done, release the VideoCapture and VideoWriter objects
cap.release()
out_avi.release()
out_mp4.release()Google Colab Support
To display video on Google Colab, we will install and use the ffmpeg package. Using ffmpeg we will change the encoding of the .mp4 file from XVID to H264
HTML 5 can properly render videos with H264 encoding and OpenCV doesn’t have that encoding yet. That’s why we need to change their encodings such that they can be rendered.
# Installing ffmpeg

!apt-get -qq install ffmpeg
Currently, HTML5 only suports renedering of MP4 files, so we’ll only change the encoding of the race_car_out.mp4 file.
# Change video encoding of mp4 file from XVID to h264
!ffmpeg -y -i "/content/race_car_out.mp4" -c:v libx264 "race_car_out_x264.mp4"  -hide_banner -loglevel error
Render MP4 Video
mp4 = open("/content/race_car_out_x264.mp4", "rb").read()
data_url = "data:video/mp4;base64," + b64encode(mp4).decode()

HTML(f"""<video width=700 controls><source src="{data_url}" type="video/mp4"></video>""")The video rendered in the above cell should be the same as the following.
video = YouTubeVideo("2Gju7YLfkP0")
display(video)